Every founder faces this moment: the prototype looks perfect in CAD, but you still need physical parts to prove your idea works. The problem? Most manufacturing methods demand expensive tooling and minimum orders in the hundreds. For a startup trying to validate demand, that’s unnecessary risk.
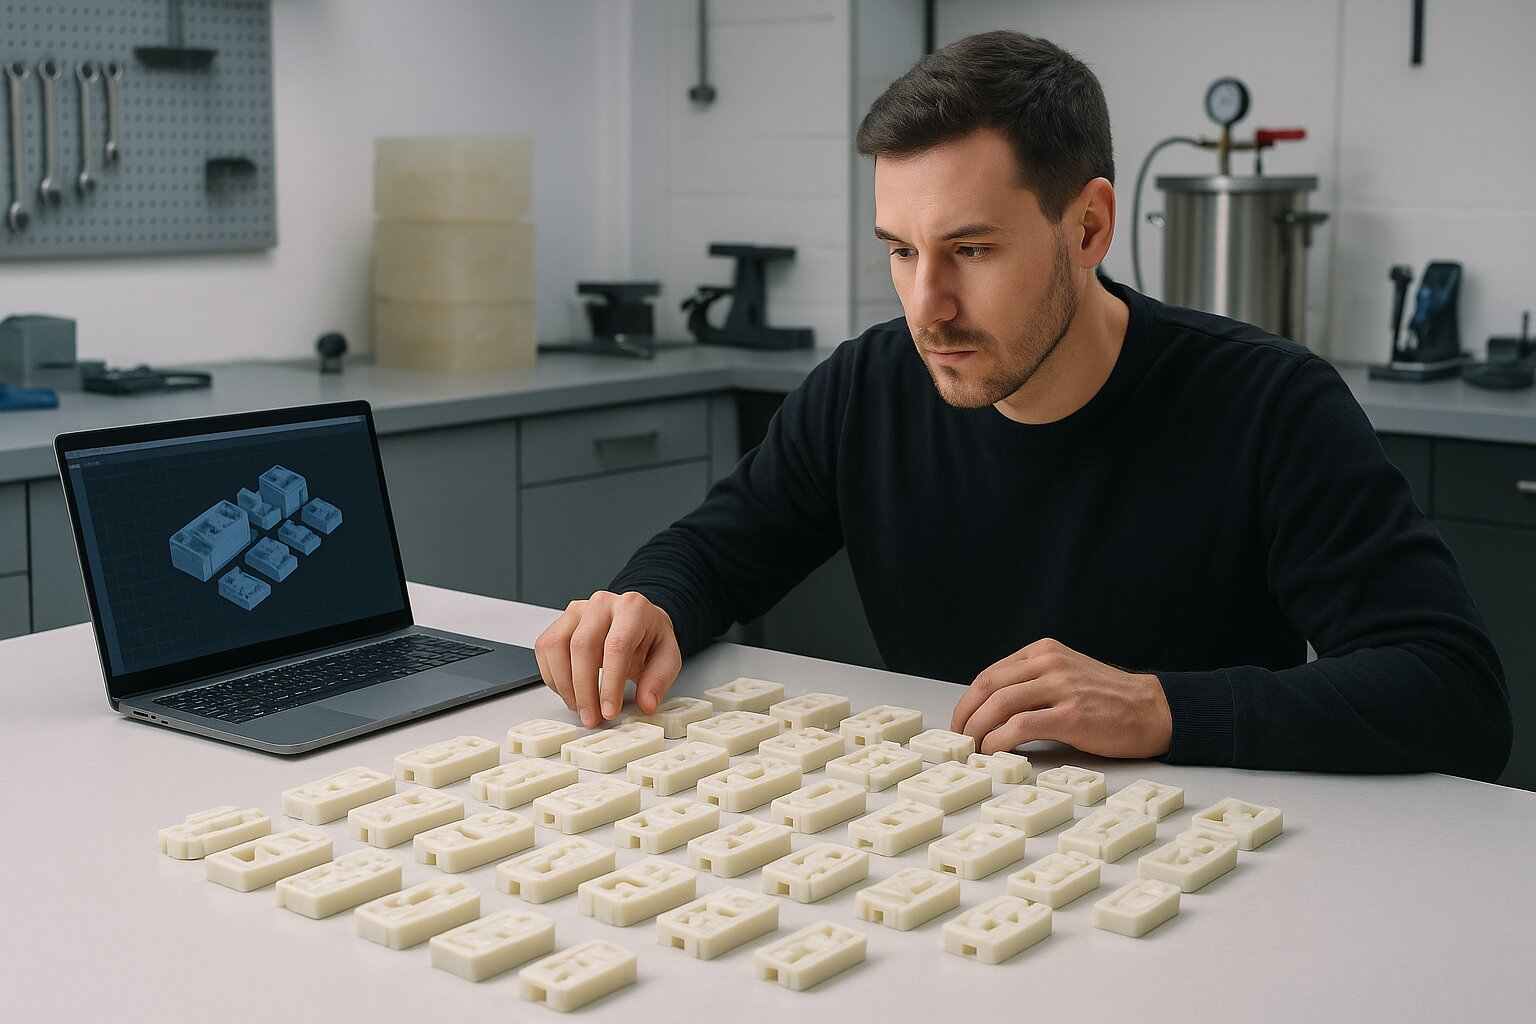
Casting offers a smarter route. It lets you create production-grade prototypes and small batches—20 to 100 units—without investing in injection molds. Yet, the challenge remains: which casting method should you choose? Vacuum, urethane, silicone, or even metal?
Selecting the right process can save thousands in cost, shave weeks off your timeline, and dramatically improve how your first product looks and performs. This guide breaks down each option to find the right casting method for low-volume prototypes, so you can make a founder-level decision with engineering clarity.
The Role of Right Casting Method for Low-Volume Prototypes
Low-volume manufacturing fills the gap between rapid prototyping and mass production. It’s ideal for founders who need a few dozen functional units to:
- Validate usability and customer feedback
- Test on Amazon, Shopify, or Kickstarter
- Ship early beta versions to investors or reviewers
Casting plays a central role here because it combines affordable tooling, real-world materials, and professional finish quality.
Unlike 3D printing, which often shows layer lines and limited material options, casting produces smooth, injection-mold-like parts. And unlike injection molding, which requires steel tooling and high MOQs, casting can deliver your first batch in 7–14 days—fast enough to stay ahead of your funding milestones.
Overview of Major Casting Methods for Prototypes
Vacuum Casting
Vacuum casting is the most popular choice for low-volume plastic prototypes. A master model—often 3D printed—is used to create a silicone mold. That mold is then placed in a vacuum chamber, where liquid resin is poured and drawn into every detail without air bubbles.
Why founders choose it: it delivers near-production quality at low cost, ideal for early sales or investor demos.
Best for:
- Consumer electronics housings
- Cosmetic shells or covers
- IoT devices and gadget enclosures
Advantages
- Tooling costs 90% less than injection molding
- Lead time: as fast as 7–10 days
- Excellent surface finish and color options
- Consistent dimensional accuracy
Limitations
- Silicone molds wear out after ~25–30 shots
- Not suited for high-temperature or structural loads
Startup Tip: Vacuum casting is perfect for founders needing 20–100 polished parts to photograph, test, or sell before investing in full tooling.
Urethane Casting
Urethane casting uses polyurethane or similar resins poured into silicone molds. The material flexibility allows it to mimic both rigid plastics and rubber-like elastomers.
Why it’s valuable: you can simulate multiple materials—from a soft handle to a durable gear—without changing the process.
Best for:
- Wearables, grips, or handles
- Functional parts with impact resistance
- Components needing flexibility or durability
Advantages
- Wide material library (rigid, translucent, flexible)
- Excellent for functional testing
- Affordable for short production runs
Limitations
- Mold lifespan is shorter than rigid casting
- Slightly longer curing time between batches
Founder Example: A pet-tech startup used urethane casting to make 50 flexible collars with embedded sensors—enough to run a pilot test before scaling production.
Silicone Molding
Silicone molding involves creating a mold directly from a master part using silicone rubber. It’s simple, affordable, and works well for small, detailed components or soft-touch materials.
Best for:
- Soft buttons, pads, or small gaskets
- Prototypes requiring high precision or complex geometries
Advantages
- Extremely low tooling cost (ideal for under 20 units)
- Works with many casting resins
- Captures fine surface detail
Limitations
- Not suitable for large parts or structural designs
- Slower when multiple components are required
Practical Use: Perfect for iterative concept testing, where you want to make a few samples, gather user feedback, and tweak your CAD before mass production.
Metal Casting
Some prototypes require the strength, heat resistance, or conductivity only metals provide. Metal casting—often using aluminum or zinc alloys—is used for functional or mechanical parts that need to perform under stress.
Best for:
- Tooling components, brackets, or enclosures under load
- Automotive or industrial prototypes
Advantages
- High durability and heat tolerance
- Suitable for final-use testing
Limitations
- Higher cost and lead time
- Requires more finishing and post-processing
When to Consider: Only after validating your plastic design and confirming market demand. Metal casting should support the transition from prototype to production-ready hardware.
Comparing Casting Methods: Cost, Speed, and Quality
| Method | Ideal Use | Tooling Cost | Cost per 50 Units | Lead Time | Surface Finish | Mold Life |
| Vacuum Casting | Plastic housings, shells | Low | $$ | 7–10 days | Excellent | ~25 parts |
| Urethane Casting | Flexible or rubber-like parts | Low | $$ | 7–10 days | High | ~25 parts |
| Silicone Molding | Soft or complex parts | Very Low | $$ | 10–14 days | Good | ~10–20 parts |
| Metal Casting | Structural prototypes | Medium | $$$ | 14–21 days | Excellent | Long-term |
Insight: For 80% of early hardware founders, vacuum or urethane casting provides the sweet spot—production-quality results at minimal cost and speed.
Vacuum Casting vs. Injection Molding: When Each Makes Sense
It’s tempting to jump straight to injection molding, but tooling costs alone can consume your entire prototype budget.
| Factor | Vacuum Casting | Injection Molding |
| Setup Cost | $500–$2,000 | $5,000–$20,000+ |
| Lead Time | 7–10 days | 4–8 weeks |
| MOQ | 20–100 units | 500–5,000 units |
| Material Range | Polyurethanes / resins | Engineering plastics |
| Best For | Testing, pilot batches | Scaling production |
If you’re launching your first 100 units to validate demand, vacuum casting wins every time. Once you’ve proven product-market fit, injection molding becomes more economical for scaling.
Prototyper Insight: Many clients combine both—using vacuum casting for their first 50-100 test units, then converting to injection molds once the design and demand stabilize.
How to Choose the Right Method for Your Product
Use this framework to guide your choice:
- Define your production goal
- Validation batch → Vacuum or urethane
- Investor demo → Vacuum or silicone
- Functional test under load → Metal
- Match material properties to function
- Rigid part → Vacuum or injection-grade resin
- Flexible part → Urethane or silicone
- Heat-resistant part → Metal
- Consider time vs. cost trade-off
- Need it in a week → Vacuum casting
- Have 3–4 weeks → Urethane or metal casting
- Assess scalability
- Under 100 units → Casting
- Over 500 units → Transition to injection molding
By the end of this exercise, you’ll know not only what works but why it works—the foundation of smart product development.
Real-World Example: From Concept to Kickstarter in 10 Days
A first-time founder in Austin wanted to test a modular kitchen gadget. He only needed 50 high-quality housings for photography and influencer demos.
- Chosen Method: Vacuum casting
- Result: Delivered in 10 days, under $2,500 total
- Outcome: The prototypes looked retail-ready, generated pre-orders, and attracted angel funding.
Instead of burning $10,000 on molds, the founder validated demand, improved design through feedback, and transitioned to small-batch production—all within six weeks.
When to Use Casting for Small-Batch Manufacturing (20–100 Units)
Casting isn’t just for prototypes—it’s a practical way to produce your first sellable inventory.
When to use it:
- Launching a limited pre-order or pilot batch
- Testing new versions of an existing product
- Producing early units for beta customers or crowdfunding rewards
Why it works:
- Flexible order quantities
- Easy design tweaks between batches
- Lower financial exposure before scaling
At this stage, your goal isn’t mass production—it’s proof of market traction. Casting helps you reach that proof point faster and safer.
Get Your Prototype Cast and Ready in 7 Days
The right casting method can cut months off your development cycle and thousands from your budget. But the right partner ensures it happens smoothly.
PrototyperLab bridges the best of both worlds:
- 7-Day Rapid Prototyping—from CAD to physical parts
- 20-Unit Minimum Production—test without big commitments
- $25/hour Transparent Pricing—pay only for real engineering time
- US Contracts + Vietnam Production—legal protection + cost advantage
Founders don’t have to gamble on manufacturing. With the right casting strategy—and a partner who understands startup speed—you can build, test, and launch confidently.Start your prototype today. Get your casting quote and validate your idea faster.