

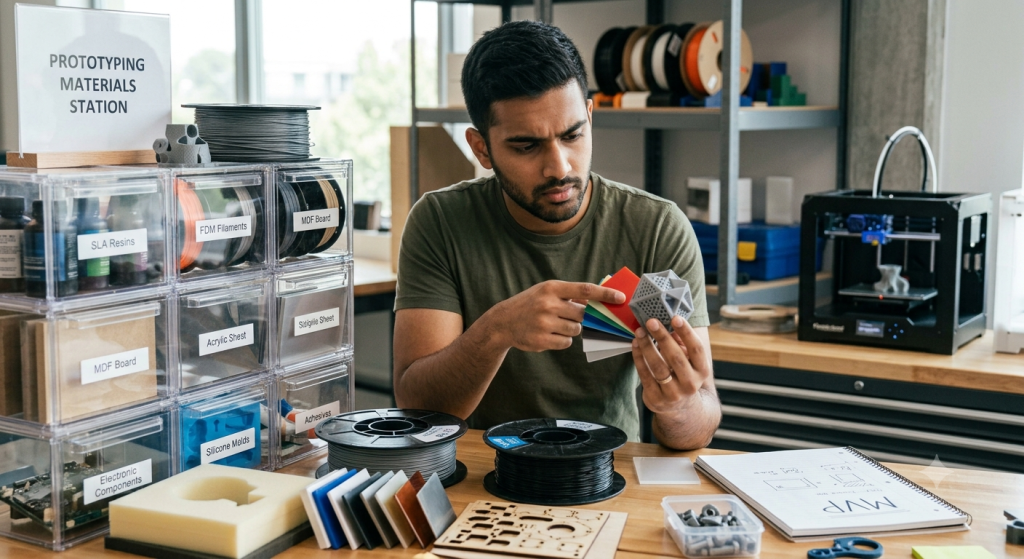
Here’s a mistake that happens more than it should: a founder builds a prototype, tests it, likes what they see, and moves toward production. Then the production parts arrive and something is off. The feel is different. A part that snapped together in the prototype now doesn’t. A surface that looked great in the sample looks cheap at scale.
The product didn’t change. The material did.
Most founders think about materials for prototyping as a cost decision. Cheaper material, cheaper prototype. But material choice is actually a data quality decision. The wrong material gives you answers to questions you weren’t asking, and misses the questions that actually matter.
This guide cuts through the confusion. It’s organized around what you’re trying to learn at each stage, not around material specs.
The One Question That Should Drive Every Material Decision
Before picking any prototyping material, ask one question: what does this prototype need to prove?
That question changes at every stage of development. A prototype at the concept stage needs to prove proportion and scale. A prototype at the functional stage needs to prove that parts assemble and move correctly. A pre-production prototype needs to prove that the product looks and behaves close enough to the final version to show buyers, investors, or early customers.
Each of those questions requires a different material. Using the wrong one doesn’t just waste money on the prototype itself. It wastes the time you spend drawing conclusions from data that doesn’t transfer to the real product.
Stage 1: “Does This Look Right?” (Concept and Form Validation)
At this stage, you’re not testing how the product performs. You’re checking whether the shape, size, and proportions are correct. Does it fit in the hand? Is the scale right? Does it look like the product you imagined?
For this, cheap and fast is the correct strategy. Rapid 3D printing in basic materials is the right call. You’re not asking the material to do anything structural. You just need a physical object you can hold, look at, and evaluate.
What to use:
- Standard FDM plastic (PLA): The fastest, most affordable option for early form mockups. Parts typically run $30 to $150 depending on size. Surface finish is rough and layer lines are visible, but none of that matters when you’re checking scale and proportion.
- SLA resin: Smoother surface, better detail, still fast. The right choice when you need to evaluate aesthetics, show the prototype to someone else, or photograph it for early feedback. Parts run $50 to $200 for most consumer product sizes. If the product’s form has fine detail, a logo, or any surface feature that matters visually, SLA is worth the small premium over FDM.
What not to use: Anything that costs more or takes longer than the above. A machined aluminum prototype at this stage is like hiring a graphic designer to sketch a wireframe. The fidelity doesn’t match the question.
The founder logic: Run two or three rapid 3D printing iterations at $50 to $150 each until the form is right. That’s $150 to $450 to get a confirmed geometry. It’s the cheapest decision you’ll make in the entire development cycle.
Stage 2: “Does This Work?” (Functional Validation)
Now the questions get harder. Do the parts fit together? Do the moving components actually move? If there’s a snap fit, does it snap? If there’s a hinge, does it flex without breaking?
This is where cheap materials start lying to you. PLA is brittle. Standard resin cracks under load. If your prototype fails a functional test in these materials, you don’t know whether the design failed or the material failed. That ambiguity is expensive to resolve.
What to use:
- PETG or ABS (FDM): A meaningful step up from PLA in toughness and flexibility. Good for assemblies that need to snap together, fit checks on parts with moving interfaces, and any functional test that involves moderate handling. Cost is only slightly higher than PLA, typically 1.5x to 2x. For most founders doing first-round functional testing, this is the right call.
- SLS nylon: This is the material that closes the gap between a 3D-printed prototype and a real injection-molded part. Parts come out with consistent strength in every direction, no visible layer lines, and real snap-fit behavior. If your product has an assembly with moving parts, hinges, or interlocking components, SLS nylon gives you test data you can actually trust. Parts run $100 to $600 depending on size and geometry. Worth it.
- Flexible TPU: For any component that needs to flex, grip, or compress, TPU printed on an FDM machine gives you a working approximation. Gaskets, grips, overmolded sections—TPU lets you test fit and function before committing to silicone mold tooling. Cost is comparable to PETG.
What not to use: Standard PLA or basic resin for any part that will be assembled, snapped, flexed, or put under any kind of load. You’ll either break it in a way the production part never would, or it’ll hold together in a way the production part never will. Either outcome sends you in the wrong direction.
The founder logic: Spend the extra $100 to $300 to test in a material that behaves like your production part. The alternative is discovering the problem after tooling is cut, which costs 10x more to fix.
Stage 3: “Will It Hold Up?” (CNC Prototype and Precision Validation)
At some point, plastic approximations stop being useful. When the product has metal components, tight tolerances, structural requirements, or thermal demands, you need a prototype that’s made from the actual production material—not something that behaves kind of like it.
This is where a CNC prototype becomes the right tool. Prototype machining cuts parts from solid blocks of real material: aluminum, steel, engineering plastics. What comes off the machine is the same material as the production part. The thermal behavior is real. The strength is real. The surface finish is real.
What to use and when:
- Aluminum (the most common CNC prototype material): If the product has a metal enclosure, housing, or structural component, machined aluminum is the right prototype material. It tells you exactly how the part will feel, how it will dissipate heat, how threads will engage, and how the surface will take a finish. Cost for prototype machining in aluminum: $200 to $1,500 per part depending on complexity.
- Steel or stainless steel: For brackets, structural parts, and anything that needs higher strength or corrosion resistance than aluminum provides. Costs more to machine, takes longer, but necessary when the production part will be steel. Don’t prototype in aluminum if the production part is stainless—the data won’t transfer cleanly.
- Engineering plastics (Delrin, nylon, PEEK): If the production part will be injection-molded in an engineering plastic, CNC machining in that same material gives tighter tolerances and better surface quality than any 3D printing process. For precision plastic components with close mating interfaces, this is the right call before committing to an injection mold.
What not to use: A 3D-printed approximation of a metal part for any test that involves structural load, heat, or precision fit. The data you collect in resin doesn’t tell you how aluminum will behave. It just tells you how the resin behaved.
The founder logic: CNC prototype work is more expensive than 3D printing. It’s also the only way to validate a metal product in the real material before spending $5,000 to $30,000 on production tooling. One CNC prototype that catches a design flaw pays for itself many times over.
Stage 4: “Is This Ready to Show?” (Pre-Production and Appearance Validation)
You’ve validated the form. You’ve validated the function. Now you need a prototype that looks close enough to the production version to show buyers, investors, or early customers with confidence. This is the pre-production prototype, and it’s often the most material-complex stage of development.
Most pre-production prototypes combine multiple materials and processes. A consumer product might have machined aluminum structural components, cast urethane plastic panels, and molded silicone grips. Each piece requires its own material strategy.
What to use:
- Urethane casting from a silicone mold: For plastic exterior components, this is the most cost-effective way to produce parts that look like production without paying for a production injection mold. A silicone mold made from a high-quality SLA master produces cast parts in colors and surface finishes that closely match what injection molding will produce. Mold cost: $300 to $1,500. Per-part cost after mold: $20 to $100. For pre-production runs of 10 to 50 units, this process dramatically reduces cost compared to tooled production.
- Cast silicone for soft components: Grips, seals, buttons, and flexible covers all need to be validated in actual silicone before the product is shown to buyers. The feel, the compression, the rebound—none of that is accurately represented by TPU or flexible resin. Cast silicone gives you the real thing. Mold cost: $400 to $2,000. Per-part cost: $30 to $150.
- Surface finishing: Anodizing aluminum, painting or texturing cast panels, and coating surfaces aren’t just aesthetic steps. They’re part of what makes a pre-production prototype read as a real product rather than a sample. A matte black anodized enclosure and a painted urethane housing look finished. The same parts in raw material look like work in progress, even if the geometry is perfect.
The founder logic: The pre-production prototype is often what gets photographed for a crowdfunding campaign, shown to retail buyers, or put in front of the first 20 customers. It needs to represent the product accurately. Cutting corners on material at this stage creates a gap between what you showed people and what eventually arrives, which is a credibility problem you don’t want to solve after launch.
A Few Material Decisions Founders Often Miss
- If the product touches food or skin: Not all plastics are safe for food contact or prolonged skin contact. This isn’t obscure regulatory fine print—it’s a real constraint that affects material selection from the first prototype. If you’re building a kitchen product, a baby product, or anything worn against the skin, confirm the production material meets the relevant safety requirements before you validate in a prototype material that doesn’t. Discovering this after a pre-production run is an expensive reset.
- If the product lives outdoors: Standard PLA, ABS, and most 3D printing resins degrade under UV exposure. If durability in sunlight is part of the product’s value proposition, prototype in a UV-stable material from the functional validation stage onward. Testing in a material that will discolor and crack in six months doesn’t give you useful durability data.
- If the product generates or manages heat: Heat changes how materials behave. Standard PLA will deform at temperatures that most consumer electronics routinely reach. If the product includes motors, batteries, or any heat-generating component, the prototype material needs to handle the thermal environment the production part will live in. This is one of the most common sources of prototype-to-production surprises.
From the Right Material to Small Batch Productions
Getting material selection right across every prototype stage isn’t just about building better prototypes. It’s about what those prototypes enable next.
Founders who validated in production-equivalent materials move into small batch productions with a short, predictable transition. The design is already proven in the real material. The small batch run confirms the manufacturing process, not the product concept.
Founders who cut corners on prototype materials reach the small batch productions stage still carrying open questions. Does the snap fit hold in injection-molded ABS the same way it did in SLS nylon? Does the aluminum enclosure dissipate heat the way the CNC prototype suggested? Those questions cost real money to answer at production scale.
Small batch productions starting at 20 units are where prototype decisions pay off or come due. The investment in correct materials earlier in the process is what makes that first batch a confirmation run instead of another round of problem-solving.
Work With a Partner Who Covers the Full Material Range
Most founders can’t get the full material range they need across their development cycle from a single prototyping service. A rapid 3D printing shop can handle concept and functional validation but can’t do CNC prototype work or silicone molding. A machine shop can handle precision validation but can’t support early-stage iteration at low cost.
The result is vendor switching mid-project, which means re-explaining the product, re-establishing tolerances, and losing the continuity that makes a development cycle efficient.
PrototyperLab covers the full range under one project. Rapid 3D printing for early-stage iteration. CNC prototype and prototype machining in aluminum, steel, and engineering plastics for precision validation. Silicone molding and urethane casting for pre-production. Small batch productions from 20 units when the design is confirmed.
Prototype turnaround in as little as 7 days. Transparent pricing at $25/hour. U.S.-based engineering leadership with Vietnam production for cost efficiency. One dedicated engineer from first prototype material decision through first batch—so the material strategy stays coherent all the way through.
Here’s a useful test: Map your product’s next prototype to the stage framework above. If you know exactly which material fits and have a partner who can deliver it in under two weeks at a price that doesn’t require a funding round, you’re set.
If either of those is uncertain, that’s exactly the conversation PrototyperLab is built for. Bring your current stage, your product type, and the question you’re trying to answer. A dedicated engineer will tell you the right material, the right process, and what it’ll actually cost—before you commit to anything.