
Most founders discover they need sheet metal fabrication at the same moment they realize 3D printing won’t solve their problem. The enclosure needs to dissipate heat. The bracket needs to hold 40 pounds. The housing needs to meet an IP rating that no printed plastic can achieve. At that point, the question isn’t whether to use sheet metal. It’s how to get a prototype sheet metal part made quickly, at a quantity that makes sense for early-stage validation, without paying for tooling designed for 100,000-unit production runs.
This guide covers the full picture: how sheet metal prototyping works, which fabrication processes apply to which situations, how to design parts that don’t cause problems at the prototype stage or later at production, how sheet metal integrates with other components like a prototype PCB board inside an electronics enclosure, and what separates a service worth hiring from a standard fab shop that will treat a 10-unit order like an afterthought.
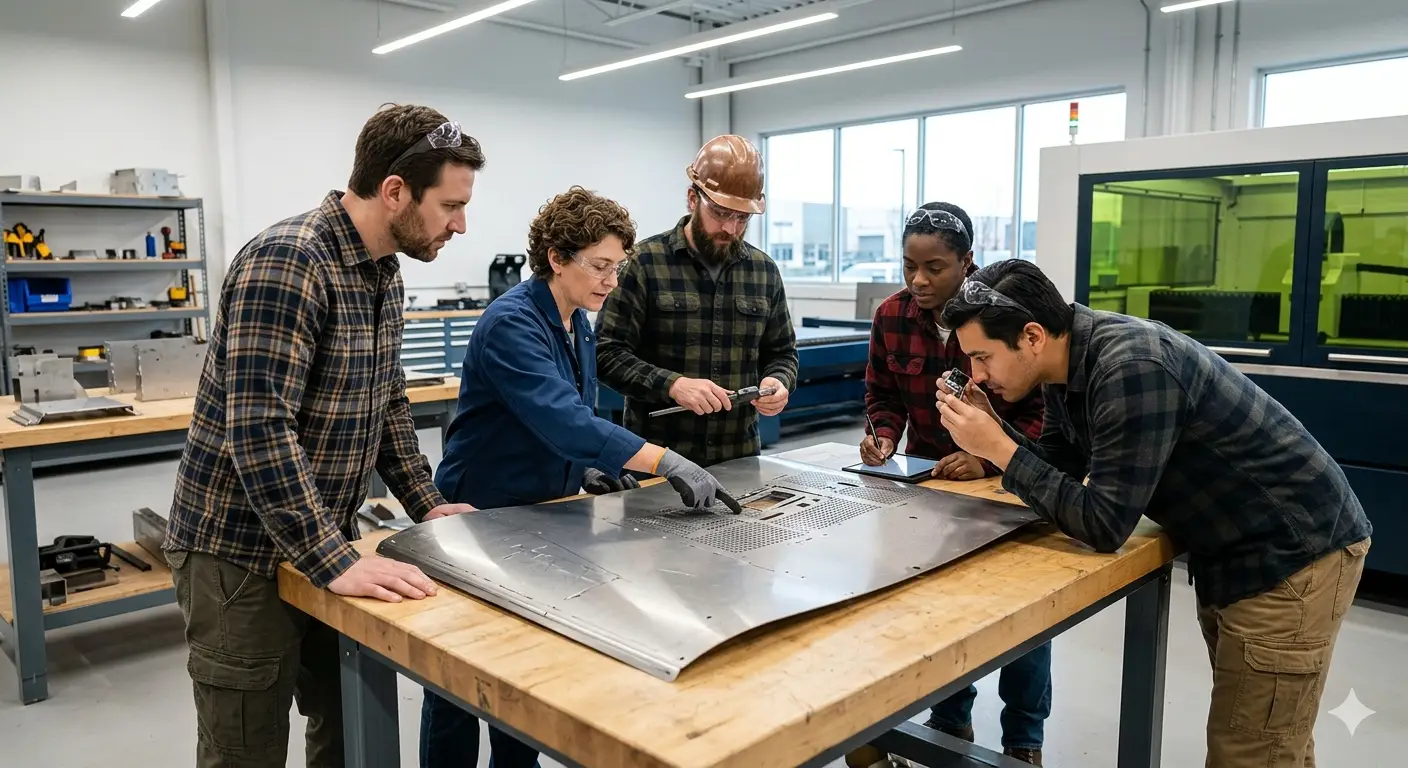
Why Sheet Metal Prototyping Is Different From Other Prototyping Methods
Sheet metal fabrication operates on different constraints than additive manufacturing. Understanding those constraints upfront shapes better design decisions and more realistic timeline and cost expectations.
Geometry is formed, not built. Unlike 3D printing, which adds material layer by layer, sheet metal fabrication starts with flat stock and forms it into shape through cutting, bending, punching, and joining operations. This means the design has to account for how the material actually moves during forming, not just what the final shape looks like in CAD.
Tolerances are tighter and more consistent. Sheet metal parts hold dimensional tolerances that most 3D printing processes can’t match without post-machining. For products where fit between components matters, this is an advantage. For designs that haven’t been validated yet, it means mistakes are more expensive to correct.
Material properties are real production properties. A sheet metal prototype made from 16-gauge cold-rolled steel behaves exactly like a production part made from the same material. There’s no “prototype material” that approximates steel the way PLA approximates injection-molded nylon. This is one of the strongest reasons to prototype in sheet metal: the test data is real.
Small quantities require the right service. Most fabrication shops optimize for volume. A 10-unit prototype order gets deprioritized behind a 500-unit production run every time unless the service is specifically structured for low-volume, rapid-turnaround work.
Sheet Metal Fabrication Processes for Prototyping
Prototype sheet metal work draws on several distinct fabrication processes. Knowing which one applies to a given component affects cost, turnaround time, and design requirements.
Laser Cutting
Laser cutting uses a focused beam to cut flat sheet stock into two-dimensional profiles. It’s the fastest and most flexible entry point for sheet metal prototyping because it requires no hard tooling. The input is a DXF or DWG file. The output is a flat-cut part ready for bending, welding, or finishing.
Best for: Enclosure panels, brackets, mounting plates, chassis components, and any part where the primary geometry is defined in two dimensions before forming.
Tolerances: Typically ±0.005 inches on cut edges for standard laser cutting. Tighter tolerances are achievable with fiber laser equipment and optimized process parameters.
Cost profile: Low setup cost, moderate per-part cost. Laser cutting is economical at prototype quantities because there’s no tooling investment between the file and the part.
Turnaround: 1 to 3 days for flat-cut parts with standard materials and no secondary operations.
CNC Bending (Press Brake Forming)
After laser cutting, most sheet metal parts require bending into their final three-dimensional shape. CNC press brakes apply precise, programmable force along a defined bend line to form angles, channels, and enclosure shapes.
Design consideration: Bend radius, bend relief, and the relationship between hole locations and bend lines all affect whether a part forms correctly. A hole placed too close to a bend line distorts during forming. This is one of the most common design errors in first-time sheet metal prototypes.
Tolerances: ±0.5 to 1 degree on bend angles for standard press brake work. Tighter angular tolerances require dedicated tooling or secondary inspection.
Turnaround: Same-day or next-day after laser cutting in a well-organized operation.
Punching and Stamping
Punching uses hardened dies to cut holes, slots, and features in flat sheet stock. Stamping forms three-dimensional features, embosses text or logos, or produces large quantities of identically formed parts from a progressive die.
The critical distinction for prototyping: Punching with CNC turret equipment requires no hard tooling for standard hole sizes and shapes, making it cost-effective at prototype quantities. Stamping with dedicated hard dies requires significant tooling investment, typically $5,000 to $50,000 or more depending on die complexity, and is only economical at production volumes.
For a 10 to 50-unit prototype run, CNC punching is the practical choice for features that punching handles better than laser cutting: high-aspect-ratio slots, louver patterns, and extruded holes for thread forming.
Welding and Joining
Complex sheet metal assemblies often require welding to join multiple formed components into a single structure. TIG welding, MIG welding, and spot welding each have different cost profiles and produce different results on thin-gauge material.
For prototype quantities, TIG welding is the most common choice. It’s slower than production welding methods but produces clean, controllable welds on the thin gauges typical of consumer product enclosures.
Hardware insertion, including press-fit nuts, threaded standoffs, and rivet nuts, is a related process that happens before or after forming and welding depending on the assembly sequence. Getting the insertion sequence right in the prototype stage avoids a category of assembly problems that causes expensive rework in production.
Surface Finishing
A prototype sheet metal part straight off the brake and out of the welder is functional but unfinished. Finishing operations that affect both appearance and performance include:
- Powder coating: Durable, uniform color finish. Common for consumer products and industrial equipment. Adds 1 to 3 days to the fabrication timeline.
- Anodizing: For aluminum parts, anodizing provides corrosion resistance and surface hardness with a clean, consistent appearance. Common for consumer electronics and outdoor products.
- Plating: Zinc, nickel, and chrome plating add corrosion protection and specific surface properties. Zinc plating is the standard for steel parts that need basic corrosion resistance without a color finish.
- Brushing and polishing: Mechanical finishing for stainless steel parts where a visible metal surface is part of the product’s aesthetic.
Specifying the finish in the initial order, not as an afterthought after the parts come back, keeps the prototyping timeline on track.
Prototype Tooling and Manufacturing: What to Avoid at the Prototype Stage
The most expensive mistake in sheet metal product development is investing in production tooling before the design is validated. Understanding the difference between prototype tooling and manufacturing tooling clarifies when each is appropriate.
Soft tooling uses machinable materials like aluminum, urethane, or 3D-printed inserts to create forming tools for low-volume runs. Setup cost is low, typically $500 to $3,000. Part quality is adequate for prototype validation. Soft tooling is not durable enough for production volumes.
Hard tooling uses hardened steel dies designed for long production runs. Setup cost ranges from $5,000 to $50,000 or more. Part quality is consistent and production-grade. Hard tooling makes economic sense only after the design is locked and production volumes justify the investment.
Committing to hard tooling before a design is validated is the sheet metal equivalent of ordering 500 units before prototyping. A single design change after hard tooling is cut means either modifying the tool, which is expensive and limited, or scrapping it and cutting new tooling.
The right sequence: validate the design using laser cutting, CNC bending, and soft tooling at prototype quantities. Lock the design. Then commission hard tooling for production.
For a founder using PrototyperLab’s small-batch manufacturing starting at 20 units, the prototype-to-production bridge doesn’t require a hard tooling commitment. A 20 to 50-unit batch can validate real-world performance, inform any final design adjustments, and produce enough units for initial customer shipments before the production tooling investment is made.
Designing Sheet Metal Prototypes That Don’t Fail at Production
A sheet metal prototype that works at 10 units but causes problems at 1,000 is a validation failure, even if it held together in testing. Good design for manufacturability at the prototype stage prevents that outcome.
Minimum Bend Radius
Every material has a minimum bend radius below which the material cracks or tears during forming. For cold-rolled steel, the minimum inside bend radius is typically equal to the material thickness. For aluminum, it’s 1 to 1.5 times the material thickness. Designing tighter radii than the material allows produces cracked parts at the bend line.
Bend Relief
Where a bend line runs close to a cutout or edge, bend relief notches prevent material from tearing during forming. A missing bend relief is one of the most common first-prototype fabrication problems. It’s easy to add in CAD before the file goes to production and expensive to discover after the first batch comes back cracked.
Hole-to-Bend Proximity
Holes placed closer than 1.5 times the material thickness from a bend line distort during bending. The rule applies to any cutout, not just circular holes. Designing with adequate clearance between features and bend lines prevents distortion that forces a revision cycle.
Consistent Material Thickness
Designing a sheet metal assembly with multiple material thicknesses adds forming setups and increases cost. Where possible, standardizing on a single gauge across all components in an assembly reduces both prototype cost and production cost.
Tolerances That Match the Process
Sheet metal parts hold tighter tolerances than most 3D-printed parts, but not as tight as CNC-machined parts. Designing a sheet metal component with CNC-machining tolerances produces a part that fails inspection even when the fabrication is executed correctly. Match the tolerance spec to the process.
When Sheet Metal and a Rapid 3D Printing Service Work Together
Not every product is purely sheet metal or purely printed. Many hardware products combine sheet metal structural components with plastic housings, printed brackets, or complex geometry that sheet metal can’t form.
A rapid 3D printing service handles geometry that sheet metal fabrication can’t: organic curves, internal channels, lattice structures, and complex undercuts. Sheet metal handles what 3D printing can’t: thin-walled structural enclosures, EMI shielding, heat dissipation, and load-bearing brackets.
A consumer electronics product might use a sheet metal chassis for rigidity and grounding, 3D-printed bezels and buttons for complex geometry, and a CNC-machined heatsink for thermal management. Getting all three processes coordinated under one engineering team rather than managed across three separate vendors eliminates the coordination overhead that makes multi-process hardware development slow and expensive.
Integrating a Prototype PCB Board With a Sheet Metal Enclosure
One of the most common sheet metal prototype challenges in hardware product development is designing an enclosure that fits the electronics inside it correctly on the first build.
When a prototype PCB board and its sheet metal enclosure are designed and prototyped independently, by different vendors or on different schedules, the fit problems that show up when they’re assembled for the first time are almost always avoidable. Standoff heights that don’t match PCB thickness. Connector cutouts that are off-center by 1.5mm. A USB port that’s blocked by a bent flange.
The solution isn’t better CAD. It’s building the enclosure and the board prototype in the same development cycle, with the same engineering team reviewing both sets of files before either goes into production. Sheet metal cutouts for connectors get verified against the actual PCB layout. Standoff positions get confirmed against the PCB’s mounting hole pattern. Clearances between board components and enclosure walls get checked before metal is cut.
For a founder building a product where the PCB and enclosure have to work together, using a single service that handles both removes the most common source of fit problems at the prototype stage.
What to Look for in a Rapid Prototyper for Sheet Metal Work
Not every fab shop is a rapid prototyper. A traditional fabrication shop might have the right equipment but the wrong operational structure for prototype-stage work. Here’s what separates a service worth hiring:
Turnaround commitments for small quantities. A service that can deliver a 10-unit prototype sheet metal run in 7 days is structured differently than one that runs small orders through the same queue as production jobs. Ask specifically about turnaround for prototype quantities, not production lead times.
In-house forming and finishing. Services that cut in-house, form in-house, and finish in-house eliminate the handoff delays that add days between operations. When laser cutting, press brake forming, hardware insertion, and powder coating all happen under one operational roof, the timeline is controlled. When they’re split across multiple vendors, every step has a shipping leg and a new intake queue.
DFM review before fabrication. A rapid prototyper worth hiring reviews files for design for manufacturability before cutting metal, not after. Catching a missing bend relief or a hole too close to a bend line before fabrication costs 30 minutes. Catching it after the first batch comes back costs a full revision cycle.
Low minimum order quantities. Sheet metal prototype orders at 10 to 20 units require a service that prices and schedules small runs without forcing a volume commitment that doesn’t fit a validation-stage product. PrototyperLab’s manufacturing starts at 20 units, which fits exactly the quantity range where most hardware founders need real-world validation without a production-level investment.
Transparent pricing. A service that discloses hourly rates before the project starts lets a founder build a real development budget. PrototyperLab’s $25 per hour rate is a specific number a founder can plan against, not a quote that arrives three days later with line items that weren’t discussed upfront.
U.S.-based oversight with production-efficient manufacturing. For founders building products sold in the U.S. market, a service with U.S.-based leadership and legal structure provides IP protection, clear accountability, and communication that doesn’t get lost across time zones. PrototyperLab’s model pairs U.S. leadership with Vietnam-based production, combining the cost efficiency of offshore manufacturing with the reliability and accountability of a domestic partner.
From Sheet Metal Prototype to Small Batch Production
A validated sheet metal prototype represents a design decision locked in metal. The next question is how many units to produce before committing to hard tooling and full-scale manufacturing.
For most hardware founders, the answer is 20 to 100 units. That range is large enough to fulfill early customer orders, test in real conditions, and collect meaningful feedback. It’s small enough to execute without a hard tooling investment or a volume commitment the business can’t yet support.
The operational advantage of using the same service for both prototyping and small batch production is continuity. The same engineering team that validated the prototype manages the production run. Files don’t need to be re-qualified with a new vendor. The design decisions made during prototyping are understood by the team executing production. And the tolerance stack-up that worked at 10 units is confirmed against the requirements of a 50-unit run before it becomes a problem.
Build the Metal Parts Your Product Actually Needs
A product that requires sheet metal fabrication is a product past the idea stage. It has real structural requirements, real thermal requirements, or real certification requirements that only metal can satisfy. That’s not a complication. It’s a signal that the product has a real use case and real market potential.
PrototyperLab works with hardware startup founders and eCommerce entrepreneurs to prototype and manufacture sheet metal components alongside PCBs, 3D-printed parts, CNC-machined components, and electronics assemblies. Prototypes in as little as 7 days. Small-batch production starting at 20 units. Transparent pricing at $25 per hour. U.S.-based leadership with Vietnam-based production.
Contact PrototyperLab to get your sheet metal prototype started.